How to Repair Heating and Air Conditioning Complete HVAC Guide
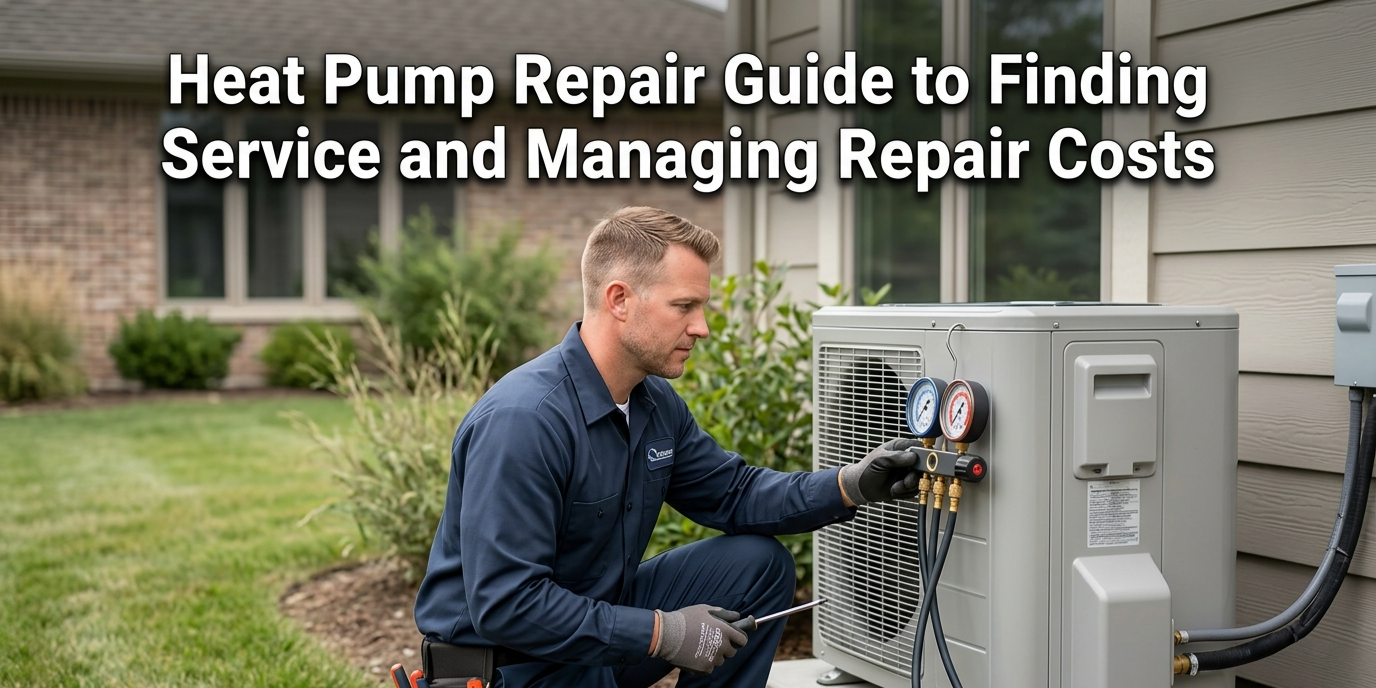
Few household problems are more disruptive than a broken heating or cooling system. When your air conditioner breaks down during a hot July afternoon or your furnace fails on a freezing January night, understanding how to repair heating and air conditioning—or at least identify the problem—can help you save time, reduce costs, and avoid unnecessary stress.
The good news is that many HVAC problems follow predictable patterns, and homeowners who understand those patterns can make smarter decisions about what they can fix themselves and what requires a professional. This guide explains how to repair heating and air conditioning systems step by step, covers the most common HVAC problems and their solutions, provides realistic repair cost ranges, and gives you a clear framework for deciding when to call an HVAC service technician.
Table of contents
- What Does Heating and Air Conditioning Repair Involve?
- How Heating and Air Conditioning Systems Work
- Feature Breakdown: Most Common HVAC Problems Homeowners Face
- Air Conditioning Repair: Diagnosing Your AC System
- Heating and Air Conditioning Service: What a Professional Tune-Up Covers
- Home AC Repair Near Me: When to Call a Professional
- Common Problems, Causes & Solutions
- Furnace Repair Service: Heating System Troubleshooting
- Common Signs Your HVAC System Needs Repair
- Pros & Cons of DIY vs Professional HVAC Repair
- Which HVAC Repairs Can You Do Yourself?
- HVAC Maintenance Tips to Prevent Future Repairs
- Conclusion
What Does Heating and Air Conditioning Repair Involve?
Heating and air conditioning repair covers a broad range of tasks — from replacing a clogged air filter (a five-minute homeowner task) to replacing a compressor (a complex job that requires an EPA-certified HVAC technician with refrigerant handling credentials). Understanding where your specific problem sits on that spectrum is the first and most important step.
A typical home HVAC system consists of two main subsystems: the heating side (usually a gas furnace, heat pump, or boiler) and the cooling side (central AC, mini-split, or the cooling function of a heat pump). These share some components — the thermostat, air handler, ductwork, and air filter — but have distinct mechanical and electrical systems that fail in different ways.
Knowing how to repair heating and air conditioning effectively starts with accurate diagnosis. A unit that runs but doesn’t cool has a different root cause than one that won’t turn on at all — and each requires a different repair approach.
How Heating and Air Conditioning Systems Work
A residential HVAC system combines equipment that controls indoor temperature, humidity and air circulation. The exact setup depends on the property, climate and type of heating or cooling equipment.
Common residential systems include:
- Central air conditioning: Uses an outdoor condenser and indoor evaporator coil to remove heat from indoor air.
- Gas or electric furnaces: Heat air and distribute it through ductwork and vents.
- Heat pumps: Transfer heat between indoor and outdoor spaces. They can provide both heating and cooling.
- Ductless mini-split systems: Use indoor air-handling units connected to an outdoor unit without traditional ductwork.
- Boiler and radiator systems: Heat water and distribute it through radiators or underfloor heating.
A thermostat controls when the system operates. Air filters help capture dust and other particles, while fans move air through the equipment and ductwork.
Understanding your system type is the first step in learning how to repair heating and air conditioning issues because the troubleshooting process varies between furnaces, heat pumps, central AC units and ductless systems.
Explore our Smart Home resources for practical guidance on home energy use, appliance efficiency and electricity costs.
Feature Breakdown: Most Common HVAC Problems Homeowners Face
Understanding the most frequent HVAC failures helps you diagnose problems faster and communicate clearly with a technician when professional heating and air conditioning repair is needed. Here are the eight most common issues:
1. AC running but not cooling — possible causes include incorrect thermostat settings, restricted airflow, dirty coils, outdoor-unit problems, or a refrigerant-system fault.
2. Furnace not igniting — gas supply issue, ignition fault or safety-control problem.
3. Uneven temperatures across rooms — often caused by duct leaks, blocked vents, or an undersized system.
4. Short cycling — airflow restriction, thermostat problems, incorrect system sizing or equipment faults.
5. Unusual noises (banging, squealing, rattling) — can indicate a loose component, failing blower motor, or debris in the outdoor unit.
6. High energy bills without comfort change — signals reduced efficiency from dirty coils, low refrigerant, or duct leakage.
To understand how much electricity your air conditioner uses, try our AC Power Consumption Calculator.
7. Frozen evaporator coil — restricted airflow or a refrigerant-system problem.
8. Clogged condensate drain — results in water leakage around the indoor unit and potential mold growth.
Air Conditioning Repair: Diagnosing Your AC System
Air conditioning repair is the most frequently searched HVAC topic — and the most seasonal. When your AC fails during summer, the urgency is real. The key to effective home AC repair is working through a logical diagnostic sequence before concluding that professional intervention is necessary.
AC Not Cooling: Step-by-Step Diagnosis
Step 1: Inspect the thermostat settings and make sure it is switched to “Cool” mode. Also verify that the set temperature is below the current room temperature, and keep the fan setting on “Auto” instead of “On” for proper operation.
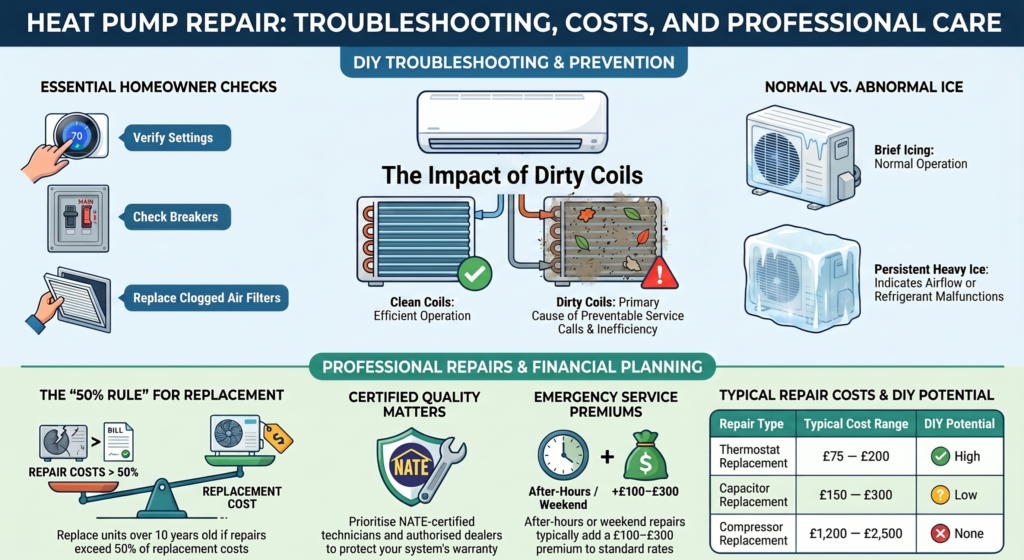
Step 2: Inspect the air filter. A filter clogged with dust restricts airflow so severely that it causes the evaporator coil to freeze and the system to lose cooling capacity. Replace the filter if it is visibly grey or blocked.
Step 3: Check the circuit breaker. The outdoor condenser unit has its own dedicated circuit breaker. If it has tripped, reset it once. If it trips again immediately, a professional AC repair service is needed.
Step 4: Inspect the outdoor condenser unit. Clear any debris (leaves, grass clippings) from around and inside the unit. Ensure at least 2 feet of clear space on all sides for airflow.
Step 5: Check for ice. If the indoor unit has ice on the refrigerant lines or coil, turn the system off and let it thaw for 2–4 hours with the fan running. Once thawed, replace the filter and restart. If it refreezes, low refrigerant is the likely cause — a licensed technician must handle refrigerant recharging under EPA Section 608 regulations.
Heating and Air Conditioning Service: What a Professional Tune-Up Covers
Regular heating and air conditioning service is the single most effective way to prevent emergency repairs and extend system lifespan. A professional HVAC service visit typically includes:
Cooling season (spring): refrigerant level check and leak test, evaporator and condenser coil cleaning, electrical connection inspection and tightening, capacitor and contactor check, condensate drain flush, thermostat calibration, and overall system performance test.
Heating season (fall): heat exchanger inspection (critical — a cracked heat exchanger leaks carbon monoxide), burner cleaning, ignitor and flame sensor check, flue and venting inspection, blower motor lubrication, filter replacement, and combustion efficiency measurement.
A complete hvac service visit costs between $80–$150 for a standard tune-up. This modest investment typically prevents repairs costing 5–10 times more by catching failing components before they cause system-wide failures.
Home AC Repair Near Me: When to Call a Professional
Some HVAC repairs are genuinely safe and appropriate for homeowners. Others are legally restricted or technically complex enough that DIY attempts cause more damage or create safety hazards. When searching for home ac repair near me, understanding this boundary protects both your wallet and your safety.
Tasks a homeowner can safely perform: replace air filters, clean the outdoor condenser unit (with power off), clear the condensate drain line, reset a tripped circuit breaker, replace a thermostat, and change batteries in a smart thermostat.
Tasks that require a licensed HVAC technician: refrigerant handling and recharging (EPA 608 certification required by federal law), electrical component replacement (capacitors, contactors, circuit boards), heat exchanger inspection and replacement, gas valve and burner work, and compressor replacement.
When selecting an AC repair service, verify the technician holds a state HVAC contractor license, carries liability insurance, and — ideally — holds NATE (North American Technician Excellence) certification, the industry’s leading professional credential.
Common Problems, Causes & Solutions
The table below summarises the most common HVAC problems, their likely causes, and whether the repair is homeowner-safe or requires professional heating and air conditioning repair:
| Problem | Likely Cause | DIY Safe? | Estimated Repair Cost |
| AC running, not cooling | Dirty filter / low refrigerant | Partial (filter only) | $0–$500 |
| Frozen evaporator coil | Clogged filter / low refrigerant | Partial (filter + thaw) | $0–$500 |
| AC won’t turn on | Tripped breaker / failed capacitor | Breaker reset only | $150–$400 |
| Furnace not igniting | Failed ignitor / dirty flame sensor | Clean sensor only | $150–$350 |
| Uneven cooling/heating | Duct leaks / blocked vents | Check vents | $300–$1,500 |
| Strange noises | Loose component / blower motor | Tighten covers only | $200–$700 |
| High energy bills | Dirty coils / duct leakage | Filter replacement | $150–$800 |
| Water leaking indoors | Clogged condensate drain | Yes — vinegar flush | $0–$200 |
| Compressor failure | Electrical / overheating | No — licensed only | $1,200–$2,500 |
| Cracked heat exchanger | Age / stress fractures | No — licensed only | $500–$2,000 |
Cost ranges are estimates for US residential systems (2024). Actual costs vary by location, system type, and labour rates. Get at least two quotes before authorising major repairs.
Furnace Repair Service: Heating System Troubleshooting
When your heating system fails, the diagnostic process for how to repair heating and air conditioning on the heating side follows a similar logic to AC troubleshooting — work from simple and safe to complex and professional.
First, check the thermostat. Confirm it is set to ‘Heat’ mode, the target temperature exceeds the current room temperature, and the system mode is not set to ‘Emergency Heat’ unless you have a heat pump and specifically need that setting.
Second, check the furnace filter. A severely clogged filter causes the furnace to overheat and shut down on its high-limit safety switch — a frustrating failure mode that disappears temporarily after the unit cools and restarts, creating the illusion of an intermittent fault.
Third, check the furnace’s error code. Most modern furnaces have a LED diagnostic light that flashes a code indicating the fault category. The code key is typically printed inside the furnace door panel. A furnace repair service technician will read this code as their first step — having it ready saves time and money.
Important: if you smell gas near your furnace, do not attempt any diagnosis. Leave the house, leave the door open, and call your gas utility’s emergency line immediately. Never attempt gas line or burner repairs without professional furnace repair service credentials.
Common Signs Your HVAC System Needs Repair
An HVAC system usually shows warning signs before a major component fails. Identifying these symptoms early can help prevent further damage.
| Symptom | Possible cause | Recommended action |
|---|---|---|
| Weak airflow | Dirty filter or blocked vents | Inspect the filter and vents |
| Warm air from AC | Incorrect settings or equipment fault | Check thermostat settings |
| Cold air from heating vents | Heating system or thermostat problem | Check operating mode and settings |
| Unusual rattling | Loose external panel or equipment component | Stop operation if noise is severe |
| Water around indoor unit | Condensate drainage problem | Check for visible blockage or overflow |
| System switches on and off repeatedly | Airflow, thermostat or control issue | Check filter and thermostat |
| Higher energy bills | Reduced efficiency or longer operating time | Review usage and arrange inspection |
These symptoms do not confirm a specific fault. A technician may need to inspect the equipment before identifying the exact cause.
Pros & Cons of DIY vs Professional HVAC Repair
Advantages of DIY HVAC Troubleshooting
Performing safe DIY steps — filter replacement, thermostat checks, outdoor unit cleaning, condensate drain clearing — resolves a significant proportion of HVAC problems without any professional involvement. Industry estimates suggest that 20–30% of HVAC service calls are for issues a homeowner could have resolved with a $10 filter replacement and a 10-minute inspection. Understanding how to repair heating and air conditioning at this basic level saves hundreds of dollars annually.
DIY troubleshooting also makes professional repairs more efficient. A homeowner who arrives at a technician conversation knowing the error code, the filter condition, and which symptoms they observed enables a faster and more targeted repair — often reducing labour time and therefore cost.
Limitations of DIY HVAC Repair
The ceiling on DIY HVAC repair is real and legally defined. Refrigerant handling without an EPA 608 certification is a federal violation in the United States. Gas line work without a licensed contractor is similarly restricted in most states. Electrical component replacement — especially capacitors, which store high-voltage charges even after power is disconnected — poses serious electrocution risk for untrained individuals.
Misdiagnosis is another significant risk. A homeowner who replaces an ignitor when the actual fault is a cracked heat exchanger has spent money without solving the problem — and potentially delayed the diagnosis of a carbon monoxide leak. When in doubt, the cost of a professional diagnostic service call ($80–$150) is well spent.

Which HVAC Repairs Can You Do Yourself?
The answer to how to repair heating and air conditioning safely as a homeowner comes down to three criteria: does the task involve refrigerant? Does it involve gas lines or the burner assembly? Does it involve high-voltage electrical components beyond a standard circuit breaker?
If the answer to all three is no, the task is generally safe for a competent homeowner. The highest-value DIY HVAC tasks — those that prevent the most failures for the least cost — are: replacing the air filter monthly during peak seasons, cleaning the outdoor condenser unit each spring, flushing the condensate drain with a diluted bleach solution quarterly, and ensuring all supply and return vents are open and unobstructed.
For everything beyond this level of maintenance, investing in professional heating and air conditioning repair pays for itself through accurate diagnosis, correct repair, preserved manufacturer warranty, and — in the case of gas and refrigerant systems — legal compliance.
HVAC Maintenance Tips to Prevent Future Repairs
The most effective strategy for how to repair heating and air conditioning less often is to maintain it consistently. These six habits reduce breakdown frequency significantly:
1. Replace the air filter every 30–90 days depending on filter type and household dust levels. A clean filter is the single highest-ROI maintenance action available to any homeowner.
2. Schedule annual professional HVAC service — one tune-up in spring for the cooling system and one in fall for the heating system. This catches failing components before they cause system-wide breakdowns.
3. Keep the outdoor condenser unit clear. Keep vegetation trimmed to ensure at least 2 feet of clear space around the area. Rinse the coil fins annually with a garden hose (power off first) to remove accumulated dirt.
4. Check and clear the condensate drain line quarterly. A clogged drain causes water backup, potential mold growth, and in modern systems, a safety float switch that shuts the system down completely.
5. Seal duct leaks. Leaky ductwork loses 20–30% of conditioned air before it reaches living spaces — a major contributor to high energy bills and poor comfort. Mastic sealant or foil tape can address accessible leaks; a professional duct test identifies hidden losses.
6. Use the Home Appliance Energy Cost Calculator on this site to track your HVAC’s running costs over time. A sudden increase in electricity consumption without a corresponding change in comfort often signals an efficiency problem that merits investigation before it becomes a full breakdown.
Use the Home Appliance Energy Cost Calculator on this site to track your HVAC’s running costs over time.
Conclusion
Knowing how to repair heating and air conditioning — even at the basic diagnostic level — is one of the most practical homeowner skills available. It reduces emergency repair costs, helps you communicate effectively with HVAC technicians, and allows you to make confident decisions about when to attempt a fix yourself and when to call a professional.
The foundation of how to repair heating and air conditioning successfully is accurate diagnosis: identifying the symptom, isolating the system (heating or cooling), and working through the logical sequence of causes from simplest to most complex. The reference table in this guide gives you a clear starting framework for the most common HVAC problems.
For most homeowners, the best investment in heating and air conditioning repair is actually prevention: clean filters, annual professional HVAC service, and consistent seasonal maintenance. These habits reduce the frequency of unexpected breakdowns more reliably than any single repair skill. Use the Home Appliance Energy Cost Calculator on this site to monitor your HVAC’s energy efficiency — because a system that costs significantly more to run than it should is often giving you an early warning that heating and air conditioning repair or maintenance is overdue.
FAQs
Q1: How do I know if my HVAC needs repair?
Key warning signs that heating and air conditioning repair may be needed: the system runs constantly without reaching the target temperature, energy bills have increased without a usage change, you hear unusual noises (banging, squealing, rattling), there is visible ice on refrigerant lines, water is leaking around the indoor unit, or the system short-cycles (turns on and off every few minutes). Any of these warrants at minimum a professional diagnostic inspection.
Q2: Can I repair my air conditioner myself?
You can safely perform basic home AC repair tasks: replacing the air filter, resetting a tripped circuit breaker, clearing debris from the outdoor unit, cleaning the condensate drain, and replacing the thermostat. Any task involving refrigerant, electrical components beyond the breaker panel, or gas lines requires a licensed HVAC technician — refrigerant handling without EPA 608 certification is illegal under federal law.
Q4: When should I replace instead of repair my HVAC?
The industry standard guideline is the ‘5,000 Rule’: multiply the system’s age in years by the estimated repair cost. If the result exceeds $5,000, replacement is typically the better financial decision. Additional factors: if the system is over 15 years old, uses R-22 refrigerant (phased out and expensive), has required multiple repairs in the past 2–3 years, or if a replacement qualifies for significant energy-efficiency rebates.
Q5: How often should I service my heating and air conditioning?
Professional heating and air conditioning service should occur twice per year — once in spring to prepare the cooling system for summer demand, and once in fall to prepare the heating system for winter. Combined with monthly filter checks and quarterly condensate drain maintenance, this schedule prevents the majority of avoidable HVAC breakdowns.
Q6: What should I look for when hiring an HVAC service technician?
When searching for home ac repair near me or furnace repair service, verify: a valid state HVAC contractor license, general liability insurance (minimum $1 million), EPA 608 certification for refrigerant handling, and — ideally — NATE certification. Get a written estimate before authorising work, confirm warranty coverage on parts and labour, and check reviews on independent platforms rather than the company’s own website.